Templates
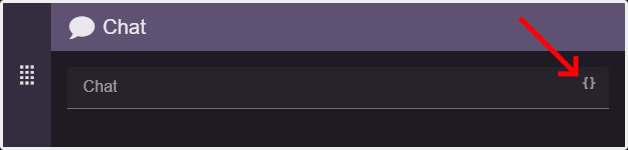
Templates are a way of changing data given to actions and overlays. Inputs that can be templated have an icon or a button with the {} symbol. CastMate will replace the template with the requested value from it's internal state.
Two Styles
There are basically two types of templates in CastMate. Those where you use the {{ template }} style and those where the {{ and }} aren't required.
To know which one to use, simply follow this rule.
- Use
{{and}}if you would normally type TEXT into the input
and
- Don't use
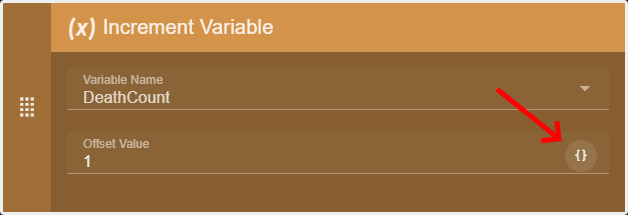
{{and}}if you would normally type a NUMBER into the input
Note: This may change in the future so you would always use the {{ template }} style to make things simpler. But as things are right now, follow the rule of thumb above.
How to Use
To figure out what you can put in a template you can look at the table while editing a trigger.
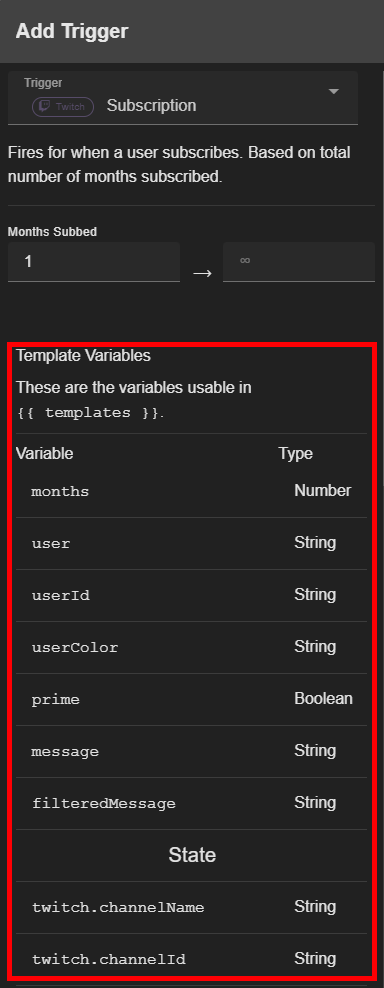
The top of the table shows values that are only available to the trigger. Everything below the "State" heading is available in every trigger and on overlays.
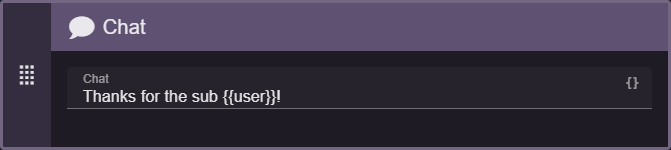
For instance if you wanted to thank a user in chat for subscribing. In your subscription trigger you could add a chat action that used {{ user }} to place the user's name in the message.
You could also pass their name to an alert.
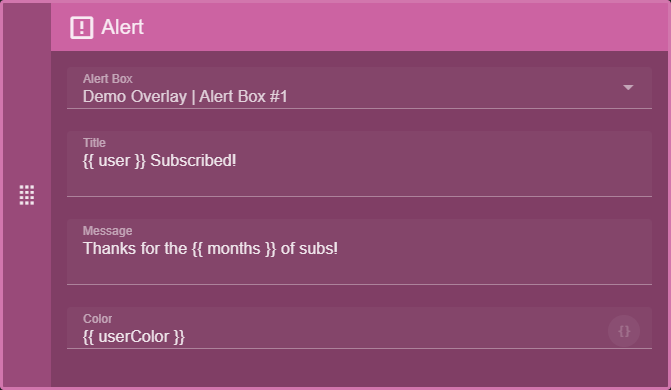
Currently the multi-line text inputs like on the Alert action aren't shown as accepting templates in the UI. But they do work with templates!
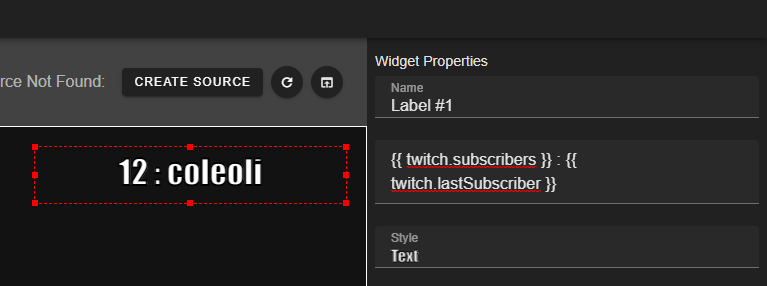
Overlays
Templates can also be used in overlay widgets like the Label. When the template value changes, the label will be automatically updated with the new value.
JavaScript
The inside of a template is actually JavaScript. So while in most cases, all you need to do is put the name of a value in there. You can nerd out and write whole javascript expressions.
